I drive a 2010 Toyota Sequoia that we got for towing our 26′ travel trailer. Not long after I got my ham license I decided that the thing to do was to put a mobile radio in it. I did a fair amount of research beforehand, and what follows is what I ended up doing.
I’ll start where most things start, under the hood at the battery:
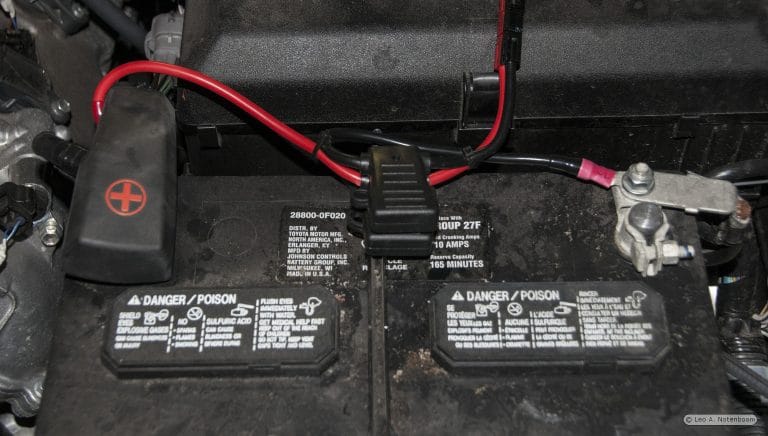 I got a spool of 10-gauge wire and began at the battery with screw-on connectors that lead to a pair of 50A fuses. I’d call them the fuses of last resort, since there’s more fusing downstream, so hopefully these will never blow. The wire goes first to an Anderson Power Pole connector for quick disconnect of everthing, should that ever be needed.
While we’re dealing with the engine compartment, here’s the antenna mount:
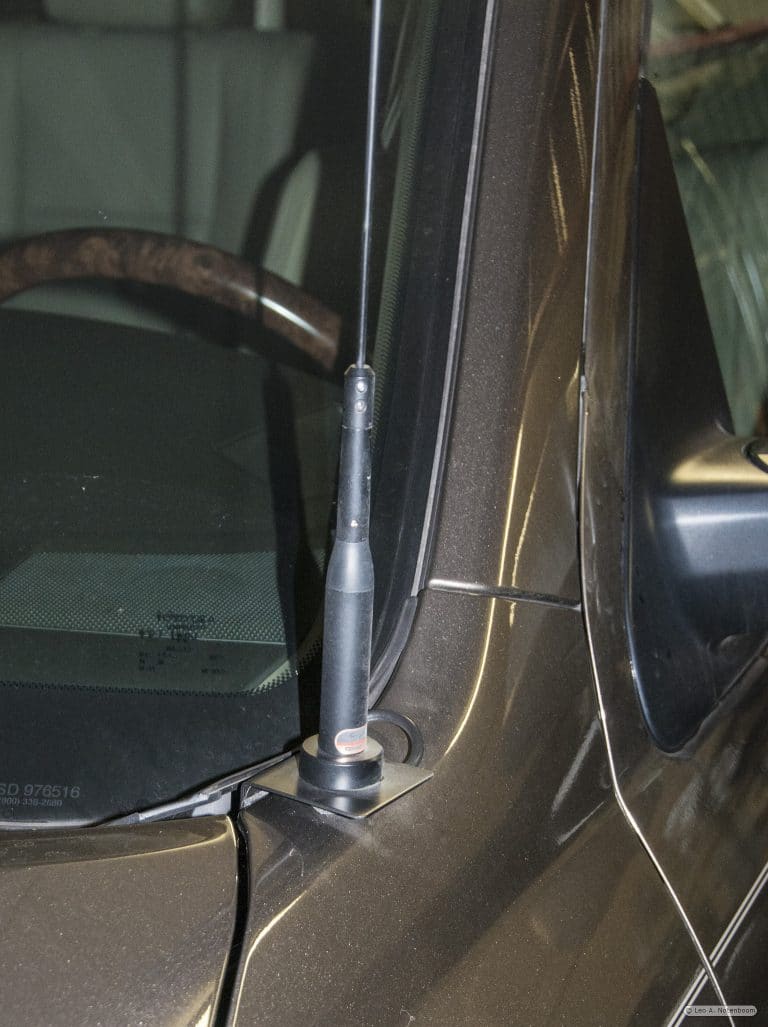 That’s a Comet dual-band antenna on an NMO roof mount that is instead placed on an l-bracket attached to the lip of the body. There’s a small piece of plastic that I lifted up to get access to the metal backside of that fender to screw in the mount. I opted to also cut off a small amount of that plastic so that it would go back into place more cleanly with the mount and screw heads in the way, but honestly that’s probably optional. The antenna cable is pointed rearward, so does a gentle loop to come back inside the engine compartment and down to the firewall.
That gives us both the antenna cable and the power cable to get from the engine compartment into the cabin. I found what can best be described as a rubber boot that has an existing wire bundle going through it:
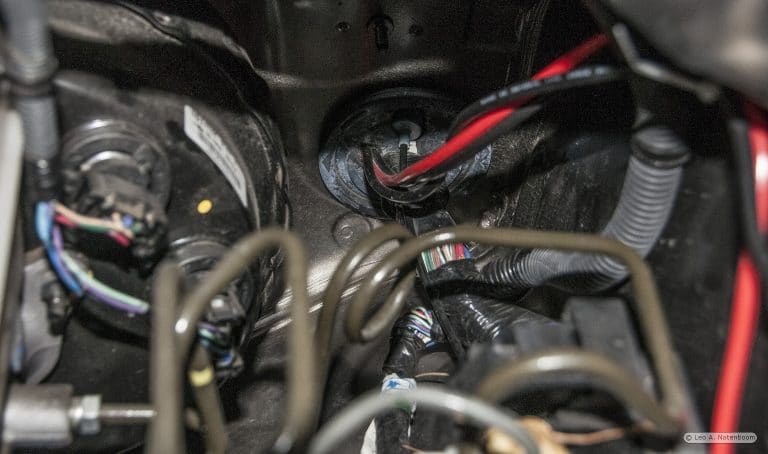 In the photo above you can see a bundle of lots of small gauge wires heading into the rubber boot. After futzing about a little I elected to poke an additional hole through that boot with a stiff wire a little ways off-center, and away from both the wire bundle and whatever that black thing going into the blue grommet is. After poking through I pulled the power and the antenna wire through to the other side:
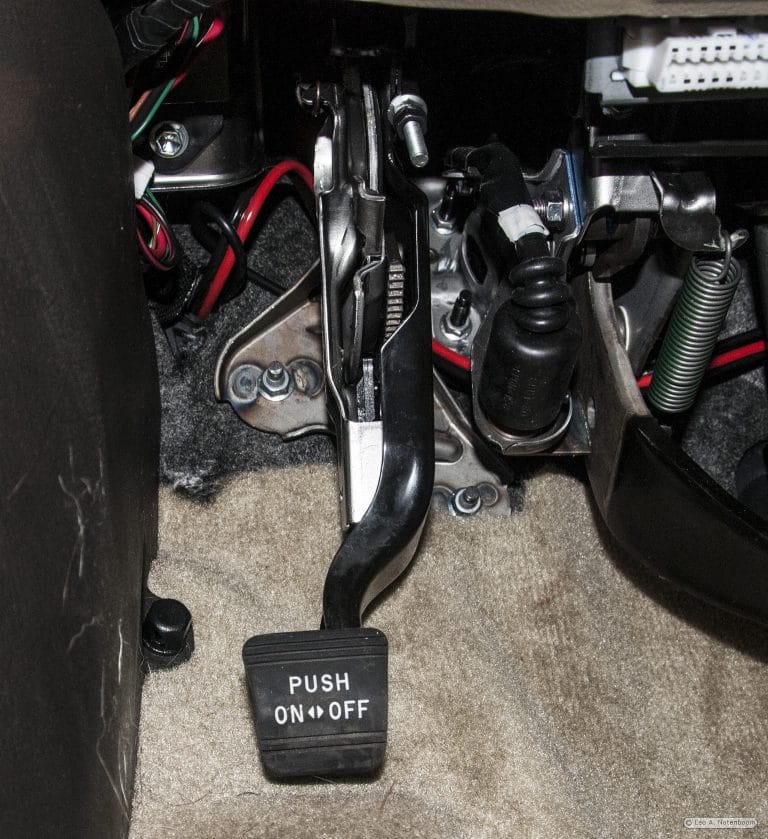 Immediately to the left of the parking brake near the top you can see the black and red power cable, along with the antenna cable, as they come through the rubber boot. I did have to cut a slit in the felt that covered it to allow the wires to pass through.
It was then fairly simple to route the cable behind the brake & gas pedal hardware and behind the center console so that it all came out on the passenger side of the console.
I terminated the power cable with Anderson Power Poles again, and installed a Rig Runner for power distribution:
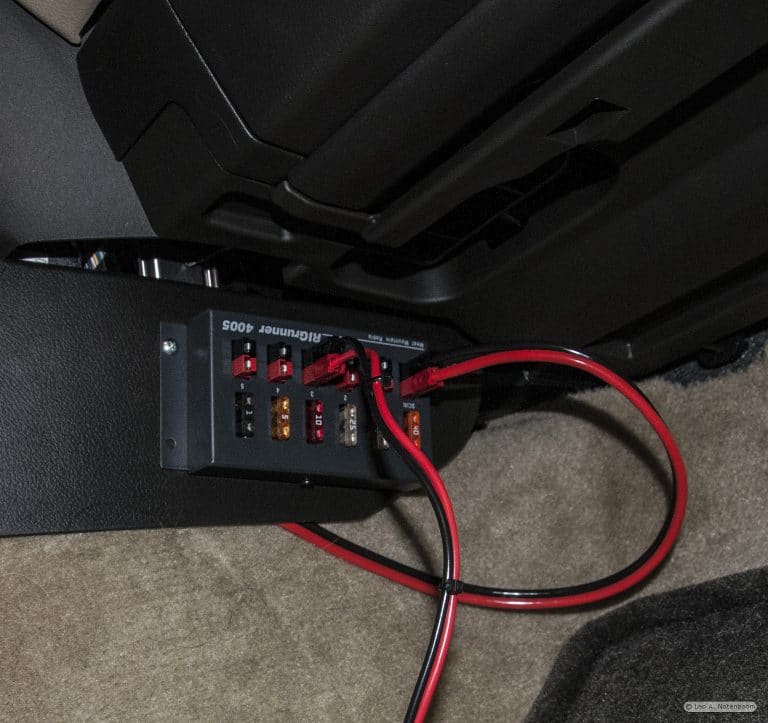 That’s mounted to the plastic covering underneath the dashboard on the passenger side of the center “hump”. The cable coming out from underneath the plastic is the incoming power from the other side, and thus connected to the “input” side of the RIGrunner. The other cable plugged into the 10A slot is the power to the radio. The antenna cable is underneath the plastic, but could come out anywhere convenient. (I left the cable long, and thus it actually comes out behind the passenger seat, and then loops back forward to the radio.)
In an unconventional move, I have the radio installed on a “freestanding” pole mount:
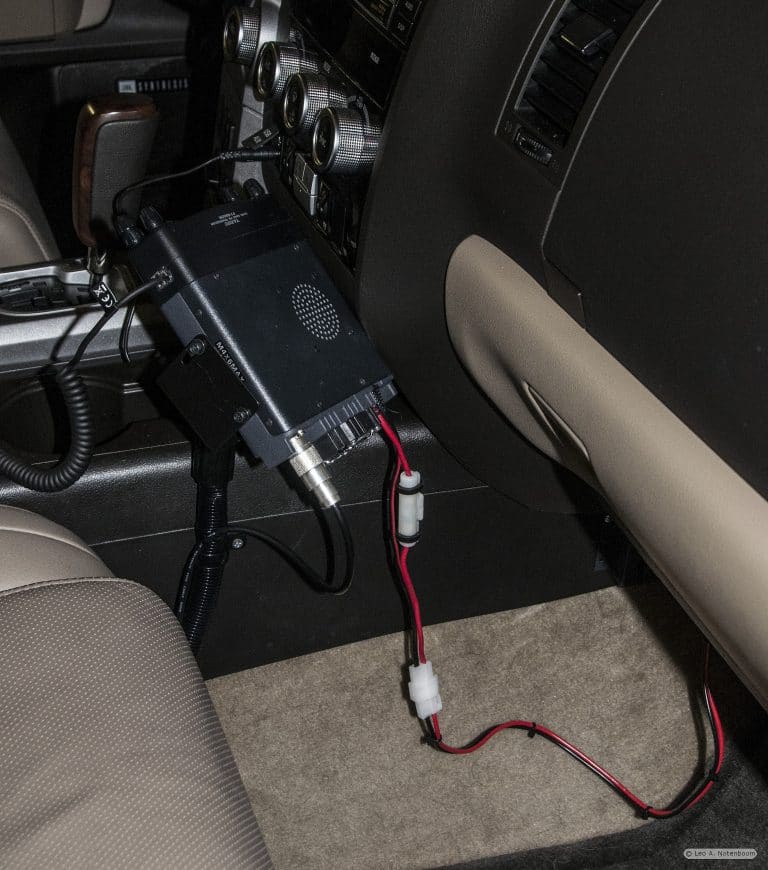 The pole mount actually attaches to the vehicle by attaching it to one of the bolts that holds down the passenger seat. The mount itself is a tad unstable, so you can see I’ve attached it with a zip-tie to the center console. In fact I should add another to make it even more stable. The beauty of this approach is that I didn’t have to find a place in the dash to put it (not many options, even with a detachable faceplate), and the radio can be easily removed.
Here’s the view from the driver’s side:
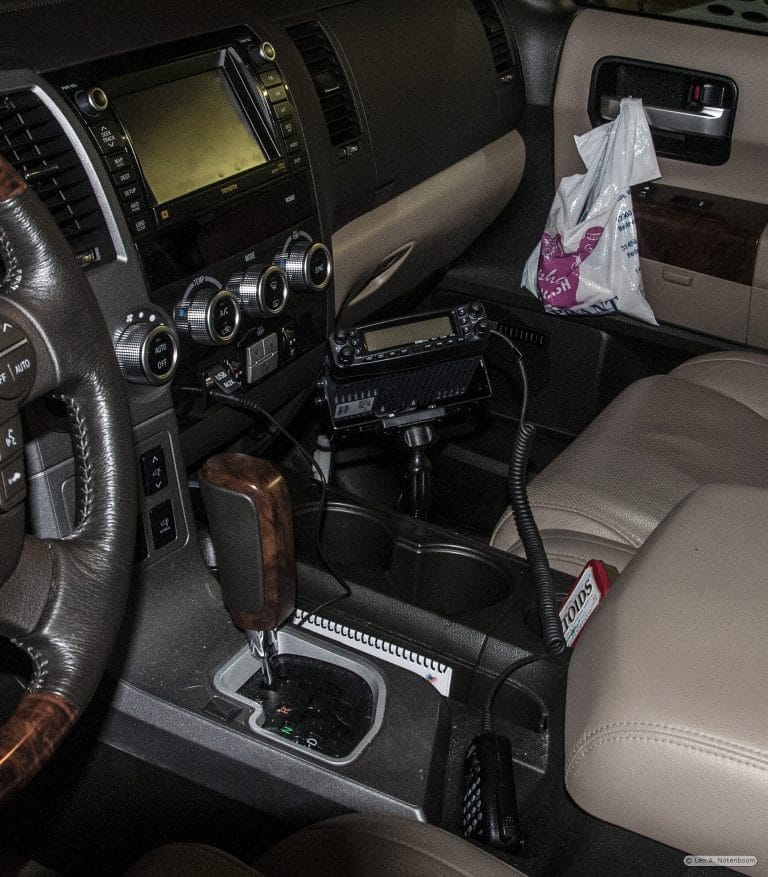 You can see that I have the mic tossed (PTT button side up) in a console cup. That spiral bound item you see there is the nifty guide for my radio as well.
Selected parts:
- Comet SBB-5NMO 2M/440 Mobile Antenna
- Larsen NMO [Motorola] Roof Mount
- Black Trunk/Gutter L-Bracket
- RIGrunner 4005
- GNO088-SBH Flexible Gooseneck Seatbolt, Floor or Console Mount
- Yaesu FT-8900R
- Compact FT-8900R Mini-Manual
Special thanks fo N7DKL (though he doesn’t know it) for his post out in the radioreference.com forums which got me the fender antenna mount solution.

You forgot to mention the most important accessory! That would be the tin of Altoids. You always want fresh breath when talking on the radio! 🙂
I’m really digging the radio mount. After looking around the cabin of my Altima, I think I’ll have to do the same thing. I just hope I can keep things as tidy as you have!
I’ll probably have to run the antenna cable to the trunk (which should be interesting), but otherwise a very similar installation.